Email me at dizzydonnadesigns@gmail.com
1 inch miniature witch tutorial.
By Donna Humphries
You will need your witch kit, scissors, pen, fabric glue, craft glue and a ruler.
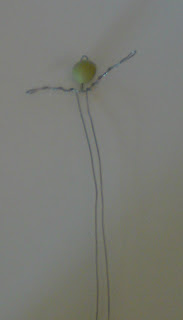
Take the head and unravel the wire.
Post one end of the wire through a hole in the head and the other into the one next to it.
Pull both ends down leaving a small loop at the top.
This is where we will use the invisible thread later on.
This is where we will use the invisible thread later on.
Twist wires to form a neck and secure the head on.
Out stretch both ends of the wire to aether side of her head.
Out stretch both ends of the wire to aether side of her head.
These will be the arms.
Measure the arm to half an inch then bend it in half back on it’s self.
Twist the wires together leaving a small loop. This is her hand.
Wind wire back up her arm to the neck base and repeat on the other side.
Cross the wires to there opposite sides and wind down until the head and end of the body is half an
inch.
inch.
Take one length of wire and bend it at half an inch. As with the arm leave a small loop at the end
for a foot. Repeat on the other side.
for a foot. Repeat on the other side.
Snip off the excess wire and wrap ends around the body. Now you have the Skeleton for our witch.
Take the wool.
Starting at the back of the neck leave a little wool hanging down so as you wrap over it we will
have secured it.
have secured it.
Wind the wool around the neck and down the arm to the hand.
Add a blob of craft glue from the neck to the hand.
Rub it in and leave for a minute or two before wrapping her hand and back up her arm to the base
of the neck. Repeat down the other arm.
of the neck. Repeat down the other arm.
Carry on wrapping the wool around her body to the top of her legs.
Continue wrapping the wool down her leg to her feet adding a blob of craft glue and give it a
minute to dry before wrapping the foot and back up the leg to the base of the body.
Repeat on the other leg. Wind some more wool around the body.
minute to dry before wrapping the foot and back up the leg to the base of the body.
Repeat on the other leg. Wind some more wool around the body.
Cut off the excess wool and use a touch of craft glue to secure the end to the back of her body.
Take the bag of feathers.
Using fabric glue take feathers and stick them around the middle of the waist all the way round.
Once dry you can add more layers.
Take the ribbon and using fabric glue stick one end of the ribbon to the bottom center of her back,
making sure you cover the ends of the feathers.
Wrap the ribbon tightly around the body to the under arms.
Cross the ribbon over her shoulder and wrap the arm to the hand.
Work the ribbon back up the arm and repeat down the other arm.
Wind a little more around the body, cut off the excess and using fabric glue secure the end to the
witches back.
witches back.
Snipping upward, trim the feather skirt to the tip of her toes.
Take the bag with the crystal ball and gem.
Bend one arm from the middle towards the front of our witch twisting the hand so it sits flat.
Then using fabric glue secure the crystal ball to her hand.
Take the small gem and again with a blob of fabric glue add the gem to aether the bottom middle of
her top or the middle of her top. You choose. Leave for ten minutes to dry.
her top or the middle of her top. You choose. Leave for ten minutes to dry.
OR
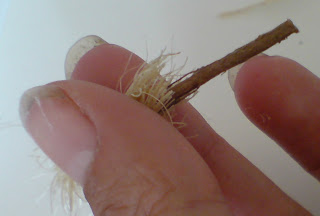
While the glue sets take the stick, three lengths of string and the short piece of wool. These will be your broom.
Take a piece of string in your fingers and rub to unwind and create bristles. Repeat with the other two pieces.
Bunch the bristles together and insert the stick into the center to about half way down.
Taking the wool wrap it around the stick and bristles, snipping the excess wool to create the broom.
Add a blob of fabric glue to secure the end and wait for it to dry.
Snip the bristles just after the stick and trim in from the sides to give the broom a rounded point.
You can aether bend the witches arm to the front of her, just below her other arm or you can out stretch it out when adding the broom with fabric glue.
OR
Now for the clear thread. Post one end through the wire loop we left at the top of her head,
then tie it off with a knot. Snip off the excess leaving a long length to hang her from.
Take the bag of bullion hair.
Separate the hair into two healthy pinches.
Straighten out both lengths of hair then fold in the middle.
Snip hair central through the loop of one of your strands.
Keeping the two halves together tie a tight knot in the middle.
Taking the other strand of hair pull out a couple of pieces.
Tie these just above half way down the hair.
Tie these just above half way down the hair.
Trim down the sides of the first strand to fit our witches head. Then trim the loop on the second
strand of hair as this will make a fringe. Also trim the other end.
strand of hair as this will make a fringe. Also trim the other end.
Add a blob of fabric glue to the top, back and sides of her head before positioning the second
strand of hair on her head making sure the invisible thread is pulled through and hanging straight.
Let the hair dry.
strand of hair on her head making sure the invisible thread is pulled through and hanging straight.
Let the hair dry.
Take the second strand of hair positioning the knot just behind the invisible thread and securing
with fabric glue.
with fabric glue.
Trim the hair down to the length you want then decide weather you would like your witch to
have messy hair or slightly tamer locks. If you opt for a tamer look add more fabric glue underneath and
stroke the hair down.
OR
Take a pen and draw two dots for eyes and a smile on her face.
Congratulations you now have a 1 inch hanging witch!
She would look great in a dolls house for Halloween.


